
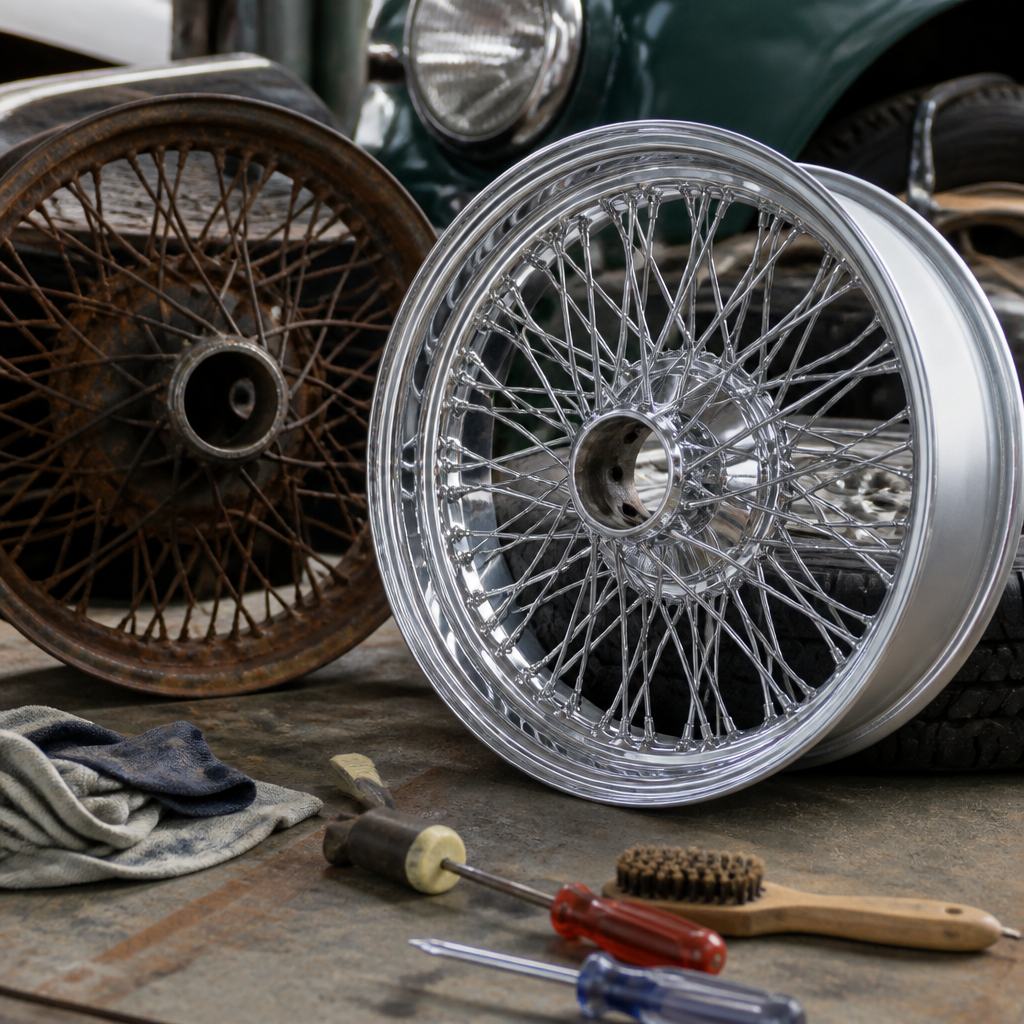
How to restore classic car wheels and rims starts with understanding that wheels are not just cosmetic trim. They carry vehicle weight, manage brake heat, seal tires, and shape how a restored car looks from twenty feet away. In the restoration shops where I have worked, wheels are often the first detail owners notice and the last component rebuilt correctly. A proper wheel restoration protects safety, preserves originality, and raises the quality of every other improvement on the car.
For classic vehicles, “wheels” usually refers to the full metal structure that bolts to the hub, while “rims” often describes the outer barrel and lip people see most clearly. In practice, enthusiasts use the terms interchangeably, but the restoration process depends on wheel type. A stamped steel wheel, a rally wheel, a Kelsey-Hayes wire wheel, a magnesium racing wheel, and a cast aluminum aftermarket wheel each require different cleaning, inspection, repair, and finishing methods. Using the wrong abrasive, primer, or coating can permanently damage scarce originals.
This hub page covers DIY restoration guides for classic car wheels and rims from assessment through final torque. It matters because mistakes are expensive and sometimes dangerous. Hidden cracks, elongated lug holes, severe pitting, or corrosion around bead seats can cause vibration, air loss, and structural failure. At the same time, careful restoration can save hard-to-find factory wheels, maintain period-correct finishes, and support accurate judging in marque events. If you want a classic car to drive straight, look authentic, and hold its value, wheel restoration deserves the same discipline as engine, paint, and trim work.
You should approach wheel restoration as a system, not a single refinishing task. Tire removal, inspection, metal preparation, repair decisions, paint or plating, balancing, and storage all affect the result. This article is designed as the central guide within a Restoration & Maintenance library, so it explains the full workflow and points toward the specialized topics every serious restorer eventually needs.
Identify the Wheel Type and Original Finish Before Any Work
The first step in restoring classic car wheels and rims is identification. Read the stampings on the back side, note diameter and width, count lugs, inspect valve stem holes, and photograph every mark before blasting or stripping. Production steel wheels often carry date codes and supplier markings. Corvette rally wheels, Mopar road wheels, Borrani wires, and period American Racing alloys all have known dimensions and finish conventions. If you remove evidence too early, you make accurate restoration harder.
Original finish matters because factory methods varied. Many steel wheels were painted semi-gloss or low-gloss black before receiving color accents, trim rings, or dog-dish caps. Some muscle car wheels used argent silver faces with contrasting charcoal pockets. Wire wheels may combine painted centers, polished stainless spokes, chrome-plated components, and painted rims. Cast aluminum often left the factory with machined surfaces protected by clear coat. Magnesium wheels were commonly treated with conversion coatings and race-oriented paint systems because bare magnesium oxidizes rapidly.
Use factory assembly manuals, dealership brochures, marque club guides, and judging manuals to verify what belongs on your car. I always recommend comparing at least two authoritative sources because restored cars online frequently show incorrect sheen levels, stripe widths, or cap colors. If your vehicle is intended for concours judging, document the exact finish code, stripe layout, and hardware style before spending money on refinishing. Good restoration begins with correct research, not a wire brush.
Inspect for Safety, Straightness, and Reusability
Once the tires, weights, stems, and trim are removed, inspect each wheel like a structural component, because that is exactly what it is. Start with the lug holes. They should be round, not ovaled from loose fasteners. Inspect the center disc for cracks radiating from the stud seats and the ventilation windows. Check bead seats for heavy corrosion where tubeless tires seal. Examine the outer lip for curb damage, flat spots, and previous hammer repairs. If a wheel has deep rust scaling, weld seams separating, or obvious heat distortion, replacement is usually wiser than repair.
Runout testing is nonnegotiable. Mount the bare wheel on a balancer or hub fixture and measure radial and lateral runout with a dial indicator. Factory tolerances vary by era and manufacturer, but noticeable wobble should never be ignored. A bent wheel can often be straightened by a specialist with hydraulic equipment, especially steel and some forged aluminum wheels. Cast wheels are less forgiving, and amateur heating or hammering can create invisible damage. Wire wheels require their own checks for spoke tension, trueness, and spline wear if applicable.
Many owners ask whether blasting will reveal hidden flaws. It often does. Paint and rust can conceal pitting around the valve hole, pinholes in old steel, or repairs buried under filler. That is why inspection should happen both before and after stripping. When in doubt, consult a wheel restoration specialist or a nondestructive testing shop. Dye penetrant inspection is affordable for suspected cracks in aluminum and magnesium, and magnaflux methods can help with ferrous components. Cosmetic restoration is pointless if the wheel cannot safely return to service.
Clean, Strip, and Prepare the Surface Correctly
Proper surface preparation determines whether the finish lasts one season or ten years. Degrease first with a wax-and-grease remover or water-based alkaline cleaner so you are not blasting oil into the metal. For steel wheels with moderate rust, media blasting with crushed glass or aluminum oxide is effective, but pressure must be controlled to avoid warping thin sections. For aluminum, I prefer gentler media such as fine glass bead or plastic media depending on the desired surface. Magnesium demands exceptional care; harsh blasting and moisture exposure can accelerate corrosion rather than solve it.
Chemical stripping is useful where original stampings, machined edges, or delicate contours should not be softened by abrasion. After stripping, rinse and neutralize according to the product instructions, then dry immediately with clean compressed air. Any flash rust on steel should be addressed the same day. On bare aluminum, oxidation starts quickly, so move directly to scuffing, cleaning, and primer or conversion treatment. Stainless trim rings and chrome components require separate polishing compounds and should never be blasted unless they are being replated.
Repair work belongs after stripping but before final primer. Minor curb rash on steel and aluminum can be dressed carefully. Severely gouged lips, cracked spokes, and deformed mounting pads are specialist jobs. Avoid polyester filler on areas that flex or experience tire-mounting stress. On driver-level cars, metal-filled epoxy can sometimes stabilize minor cosmetic pits outside structural areas, but concours restorations generally favor metal repair and correct surfacing over heavy filler use. Preparation is slower than painting, but this is where durable results are created.
Choose the Right Repair and Refinish Strategy
Not every wheel should be restored the same way. The right process depends on material, intended use, originality goals, and budget. The table below summarizes the decisions I make most often in the shop.
| Wheel type | Common issues | Best restoration approach | Main caution |
|---|---|---|---|
| Stamped steel | Rust, bent lips, chipped paint | Blast, test runout, straighten if needed, epoxy prime, paint in correct sheen | Do not hide severe bead-seat corrosion |
| Cast aluminum | Oxidation, curb rash, peeling clear coat | Strip, inspect for cracks, machine or sand repairs, etch or epoxy prime, paint or clear | Avoid aggressive grinding that changes profile |
| Forged aluminum | Scratches, finish failure, minor bends | Specialist straightening, careful refinishing, preserve forging integrity | Improper heat can weaken the wheel |
| Wire wheel | Loose spokes, rust, plating loss | Disassemble or specialist rebuild, true and tension, then plate or paint correctly | Cosmetic cleanup does not fix structural spoke problems |
| Magnesium | Porosity, oxidation, coating failure | Specialist inspection, corrosion treatment, sealing primer, correct topcoat | Fire risk and hidden degradation demand expert handling |
Powder coating is popular because it is durable, but it is not always the best choice for originality. Many factory wheels were liquid painted, and powder can soften stampings, alter edge definition, and produce gloss levels that look too modern. It also requires baking, which may be unsuitable for certain repaired wheels or some magnesium applications. For stock steel wheels, an epoxy primer followed by a catalyzed urethane topcoat in the correct gloss usually gives the best mix of appearance and longevity.
Chrome presents another decision point. Rechroming wire wheels, trim rings, and some specialty rims can be beautiful, but plating costs are high and quality varies widely by vendor. Triple plating with proper copper build, nickel, and chrome is the benchmark. Poor plating over pitted metal will fail early. If your goal is a reliable driver, polished stainless or argent-painted originals may be more practical than chasing mirror-finish chrome on every part.
Paint, Detail, and Reassemble Like a Restorer
Primer choice should match the substrate. Bare steel benefits from epoxy primer for corrosion resistance and adhesion. Bare aluminum often needs an etching step or an epoxy system approved by the paint manufacturer. Follow flash times exactly. Wheels have edges, windows, and lug recesses that invite thin coverage, so spray angles matter. I apply light orientation coats first, then build even film thickness while watching corners and the inner barrel. Heavy coats around lug seats can chip later when sockets contact the finish.
Color accuracy separates a generic refinish from a real restoration. Argent silver is not one universal shade. GM, Ford, Chrysler, and European makers each used different metallic content, gloss, and contrast. Black centers might be semi-gloss, satin, or almost dead flat depending on the year and model. Pinstripes and accent rings should be measured from originals whenever possible. Masking templates, fine-line tape, and turntable stands save time and produce crisp transitions on rally wheels and styled steel designs.
After curing, protect the finish during tire mounting. Use a shop with touchless or well-guarded equipment and insist on experienced handling if the wheel has fresh paint or delicate trim. Install new valve stems or correct metal stems, and use stick-on weights on the inside when visible clip-on weights would spoil the original look. Refit center caps, trim rings, and lug nuts only after checking seat style. Acorn, mag, and shank lugs are not interchangeable. Final torque must match factory specifications, and torque should be rechecked after the first drive.
Build a Complete DIY Restoration Plan and Know When to Outsource
A successful DIY wheel restoration project relies on planning as much as hands-on skill. Start by defining the standard you want: concours, show-quality driver, or durable road-use refurbishment. Then group the work into linked tasks. This hub supports deeper guides on wheel identification, media blasting methods, rust repair, aluminum wheel refinishing, wire wheel rebuilding, correct paint codes, wheel hardware, tire mounting, and storage. Treat those subjects as individual job tickets, because each one can derail a project if handled casually.
Budget realistically. In my experience, owners often underestimate the total by focusing only on paint. Add tire dismounting, blasting, runout checking, specialist straightening, primer, topcoat, masking supplies, replacement stems, correct lug nuts, trim restoration, and balancing. A set of simple steel wheels may be restored affordably at home, while rare wires or magnesium race wheels can cost more to restore than to buy reproduction replacements. That does not mean originals are not worth saving; it means decisions should reflect rarity, safety, and intended use.
Outsource when the risk exceeds your tools or experience. Crack repair, truing wire wheels, machining alloy lips, and restoring magnesium are specialist operations. So is concours-level plating. DIY restoration works best when you handle research, disassembly, cleaning, paint prep, and final detailing while partnering with experts for structural or hazardous steps. Done that way, you preserve control over quality without gambling on safety. Review your own wheels carefully, choose the right process for each material, and use this hub to plan the next guide in your restoration project.
Classic car wheel restoration rewards patience because it improves safety, originality, and the finished stance of the vehicle all at once. Identify the wheel correctly, inspect it as a load-bearing part, prepare the metal with the right methods, and choose finishes that match both the factory look and the car’s intended use. Avoid shortcuts such as coating over corrosion, ignoring runout, or treating every wheel material the same. Those mistakes usually show up later as leaks, vibration, chipped paint, or expensive rework.
The biggest benefit of restoring classic car wheels and rims properly is confidence. You know the car looks right, drives better, and is supported by components you have actually evaluated rather than merely polished. Whether you are reviving painted steel wheels on a pickup, argent rally wheels on a muscle car, or delicate wires on a British roadster, the process is manageable when broken into clear steps. Use this hub as your starting point, then move through each DIY restoration guide methodically and restore your next set of wheels to a standard worthy of the car.
Frequently Asked Questions
What is the first step in restoring classic car wheels and rims correctly?
The first step is a careful inspection and identification process, not sanding or painting. Before any restoration work begins, you need to confirm exactly what type of wheels the car has, whether they are original to the vehicle, and what condition they are in structurally. On a classic car, wheels may be stamped steel, painted factory rims, chrome-plated pieces, wire wheels, aluminum alloys, or dealer-added aftermarket wheels from the period. Each style requires a different restoration approach, and using the wrong process can damage the wheel or erase original details that matter to the car’s value.
Start by removing the wheels and cleaning off grease, brake dust, and road grime so cracks, pitting, bends, and previous repairs are visible. Check the lug holes for elongation, inspect the bead seat where the tire seals, and look closely at the rim lip for dents, corrosion, or impact damage. It is also important to inspect the center area for stress cracks and to verify backspacing, offset, and diameter so the wheels match the vehicle’s intended setup. If the car is a judged restoration, document stampings, date codes, manufacturer marks, and original finish traces before any blasting or stripping. In professional restoration work, this documentation often determines whether a wheel should be restored, repaired, or replaced with a correct original core.
Once the wheel is identified and evaluated, the rest of the project becomes much more accurate. You can decide whether a cosmetic refinish is enough or whether the wheel needs straightening, welding, replating, or full replacement. That early inspection stage is what protects safety, originality, and long-term results.
Can badly rusted or damaged classic car rims be restored, or should they be replaced?
Many rusty or worn classic rims can be restored, but not all wheels should be saved. The decision depends on structural integrity, not just appearance. Surface rust, old paint failure, moderate pitting, and minor curb damage are usually repairable. However, deep corrosion around the bead seat, severe thinning of the metal, cracked centers, distorted lug holes, and heavily bent rims can make a wheel unsafe even if it looks salvageable after refinishing. A restored classic should not rely on a wheel that has lost its strength simply because it is rare or original.
Steel wheels can often be media blasted, straightened, welded where appropriate, and refinished successfully if the metal remains sound. Chrome wheels are more complicated because rust often creeps under the plating and can hide serious pitting underneath. Wire wheels need especially close examination because spoke tension, hub wear, and rim trueness all affect safety. Aluminum wheels may suffer from corrosion, curb rash, and old repairs that require specialized welding and machining. In any of these cases, a reputable wheel restoration specialist can measure runout, inspect for cracks, and determine whether repair is practical.
A good rule is this: cosmetic defects are usually fixable, structural defects require expert judgment. If a wheel has heavy rust scaling, visible cracking, or prior poor-quality repairs, replacement is often the smarter choice. For a driven car, safety comes first. For a concours restoration, authenticity matters too, but even then, original wheels should only return to service if they can be restored to a safe operating condition. Sometimes the best compromise is preserving the original wheels for display and using correctly dated or visually matching service wheels for road use.
What is the best way to strip, repair, and refinish classic car wheels without ruining their original look?
The best method depends on the wheel material and the factory finish you are trying to replicate. In general, the process begins with stripping the old finish carefully enough to preserve stampings, edges, and factory contours. For painted steel wheels, media blasting is common, but the blasting media and pressure must be chosen carefully. Aggressive blasting can warp thinner sections or erase details. Chemical stripping may be safer for certain finishes, especially where delicate original contours need to be protected. For aluminum wheels, gentler media or specialized stripping methods are often preferred to avoid surface damage that later shows through the finish.
After stripping, repairs should be made before any primer or topcoat is applied. Bent rims can sometimes be straightened by shops equipped for wheel truing. Curb rash can be smoothed and reshaped, while pitted areas may need metal finishing or, in some cases, filling products approved for wheel refinishing. Any welding should be done by a specialist familiar with wheel metallurgy. Once repairs are complete, the surface must be cleaned thoroughly and prepared with the right primer system. Bare steel wheels typically need epoxy primer for corrosion protection, followed by high-build primer if surface leveling is required. The goal is not to make an old wheel unnaturally perfect, but to restore it cleanly while maintaining original character.
For the final finish, match the factory appearance as closely as possible. Some classic wheels were full gloss, others were semi-gloss, argent silver, body color, or a combination of painted centers and trim rings. Chrome or polished surfaces should also reflect the correct period look rather than an over-restored custom finish. This is where many restorations go wrong: wheels get painted with the wrong sheen, the wrong silver tone, or too much clear coat, and the car loses authenticity. If originality matters, use factory references, unrestored examples, and model-specific restoration guides. The best wheel restoration does not just look fresh up close; it looks correct from across the garage.
Should classic wheels be powder coated, painted, polished, or rechromed?
There is no one answer for every classic car. The correct finish depends on what the wheel originally had, how the car will be used, and whether the priority is authenticity, durability, or ease of maintenance. Paint is often the most appropriate choice for factory steel wheels because it most closely reproduces original finishes and is easier to touch up later. Properly applied automotive paint systems can be very durable when the wheel is prepared correctly and protected from corrosion underneath. For restorations aimed at factory correctness, paint is usually the safest route.
Powder coating offers excellent durability and chip resistance, which appeals to drivers who want a tougher finish for regular road use. However, it can sometimes look too thick or too uniform for a true period-correct restoration, especially on wheels with crisp stampings or subtle factory texture. Powder coating also makes spot repairs more difficult than conventional paint. On some classic wheels, especially those used on regularly driven cars, powder coating can be a practical compromise, but it is not always the best choice for originality.
Polishing is common for aluminum wheels, but it requires ongoing maintenance to keep oxidation under control unless a protective coating is applied. Rechroming may be necessary for original chrome wheels that have peeling, pitting, or rust under the plating. Done well, rechroming can transform a wheel, but quality matters enormously. Poor chrome work can leave waves, thin coverage, or hidden corrosion that returns quickly. A shop experienced in automotive wheel plating is essential. In restoration practice, the best finish is the one that balances correctness, safety, longevity, and the owner’s intended use of the car. A show car, a weekend cruiser, and a regularly driven classic may all deserve different choices even when starting from the same wheel design.
How do restored wheels and rims affect safety, handling, and the overall quality of a classic car restoration?
Restored wheels affect far more than appearance. They directly influence tire sealing, brake cooling, ride quality, steering feel, and overall vehicle safety. A wheel that is bent, cracked, poorly repaired, or incorrectly sized can cause vibration, uneven tire wear, poor tracking, and even air loss. On a classic car, where suspension and braking systems may already have less margin than modern vehicles, wheel condition becomes even more important. That is why experienced restorers treat wheel restoration as a mechanical job first and a cosmetic job second.
Properly restored wheels also improve how the car feels on the road. When wheels are true, balanced, and matched correctly to the chassis, the car tracks better, responds more predictably, and feels more composed at speed. Lug holes that are still round and precise help the wheel center correctly on the hub or studs. Clean bead seats help tires seal properly. Correct dimensions preserve intended clearance and stance. If trim rings, hubcaps, or wheel covers are part of the setup, proper restoration also ensures they fit securely instead of rattling or damaging the new finish.
From a restoration quality standpoint, wheels have a disproportionate visual impact. They are one of the first details people notice because they sit at the outer edges of the car and frame the stance. Fresh paint and bodywork can be undermined immediately by worn, incorrect, or over-restored wheels. On the other hand, correctly restored rims make the whole vehicle look more finished, more authentic, and more valuable. In professional shop work, I have seen wheel restoration elevate an entire project because it ties together safety, originality, and visual correctness in one component. That is why restoring classic car wheels and rims the right way is never just a finishing touch; it is part of building the car properly.




