
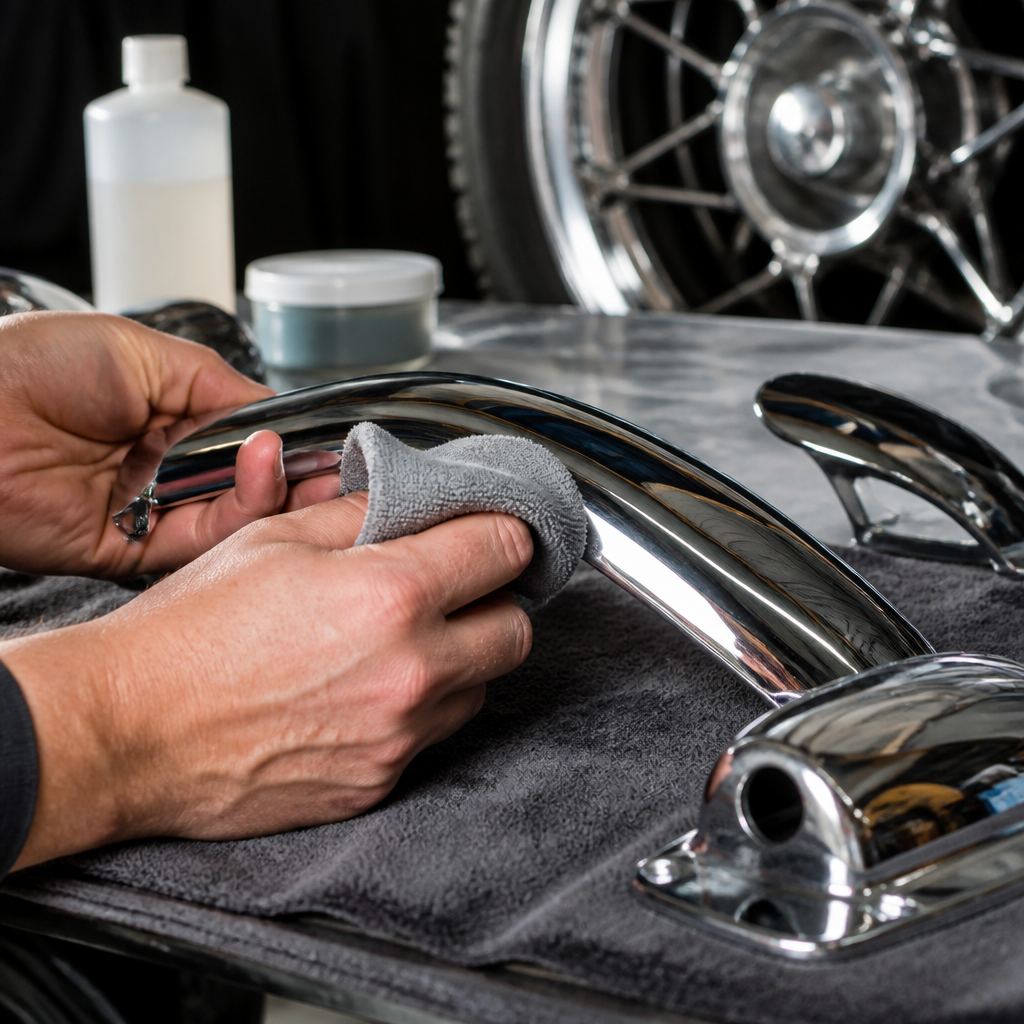
Chrome restoration at home is practical, affordable, and often good enough to return tired trim, bumpers, mirrors, racks, and hardware to a clean, bright finish without sending parts to a plating shop. In restoration work, “chrome” usually describes a decorative plated surface laid over nickel and other base layers on steel, brass, zinc die-cast, or plastic, while “polishing” means refining the existing finish and “replating” means rebuilding the metal coating entirely. That distinction matters because most home projects involve cleaning, decontaminating, rust removal, scratch reduction, and protection, not true electroplating. I have restored motorcycle fenders, vintage door handles, wheel trim, and shop fixtures this way, and the biggest lesson is simple: the result depends less on product marketing than on correctly identifying whether the part is dirty, oxidized, rust-stained, pitted, flaking, or structurally damaged.
This DIY restoration guide serves as a hub for the wider restoration and maintenance topic because chrome sits at the intersection of metal finishing, corrosion control, paint-safe detailing, and preservation. Home restorers regularly ask the same questions: Can pitted chrome be fixed? What removes rust without scratching? When should you stop polishing and send a part out? Which tools are safe on plated surfaces? Those questions deserve direct answers. Light rust, water spotting, grime, and mild haze can usually be corrected at home with the right process. Deep pits, peeling edges, blistering, cracked plating, and exposed base metal usually cannot be made truly “like new” without stripping and replating. Knowing that boundary saves money, avoids overworking irreplaceable parts, and helps you prioritize where DIY effort creates the best visual improvement.
Good home chrome work also supports the rest of a vehicle or household restoration plan. Clean brightwork changes how paint looks, makes rubber seals appear fresher, and raises perceived condition even when larger bodywork remains unfinished. For a hub article on DIY restoration guides, that matters: chrome restoration is one of the highest-impact jobs a beginner can complete with modest tools and visible progress. The process is also transferable. The inspection habits you use on chrome—checking substrate condition, testing the least aggressive method first, controlling heat and pressure, and sealing the result—apply to stainless trim, polished aluminum, painted surfaces, and plastic lenses. Approach chrome restoration as surface conservation rather than aggressive correction, and the work becomes safer, faster, and more repeatable.
Assess the part before you touch it
The first step in restoring chrome parts at home is diagnosis. Wash the part with pH-neutral soap, dry it, and inspect it under strong angled light. I use a handheld LED and move it across the surface because chrome hides defects until reflections break. Look for brown or orange dots, which usually indicate rust at pores or chips; cloudy gray areas, which suggest oxidized contamination or worn plating; white mineral rings from hard water; fine swirls from improper polishing; and raised bubbles or lifting edges, which point to plating failure. If the chrome is on plastic, common on modern trim and mirrors, treat it more cautiously because the deposited layers are thinner and heat can deform the substrate.
Next, determine the base material if possible. A magnet helps: steel parts attract strongly, while brass, aluminum, and zinc die-cast do not. Steel with rust blooms can often be cleaned effectively if corrosion has not undercut the plating. Pot metal, a common zinc alloy used on older emblems and handles, is far less forgiving; once moisture enters pits, the substrate swells and distorts the plating from beneath. That is when home restoration shifts from correction to temporary improvement. Take photos before starting. They help you compare progress honestly and support decisions about whether a part should move to a professional metal finisher, especially for rare trim where replacement is difficult.
Gather the right supplies and set up a safe workspace
You do not need a full machine shop, but you do need controlled tools. The core kit is straightforward: automotive shampoo, microfiber towels, nitrile gloves, painter’s tape, cotton applicators, 0000-grade steel wool, chrome polish, metal polish, a dedicated rust remover safe for plated finishes, a clay bar or synthetic clay mitt, isopropyl alcohol for wipe-downs, and a protective wax or sealant. For tools, a variable-speed drill with foam polishing cones can help on sturdy metal parts, though hand work is safer for beginners. Avoid coarse abrasives, sandpaper, aggressive wire wheels, and unknown compounds. They remove plating fast, especially along edges and raised details where coating thickness is lowest.
Ventilation matters because many polishes use solvents or ammonia-based cleaners. Wear eye protection, especially when using steel wool or powered accessories. Work on a padded bench or folded towels to prevent fresh dents. If the part is still mounted on a vehicle, mask adjacent paint, rubber, and textured plastics. Some chrome polishes stain porous trim and leave white residue in seams. Keep separate towels for washing, polishing, and final buffing to avoid dragging grit across the surface. A simple discipline I follow on every project is the least-aggressive test spot: one small area, one mild product, one pass. If that spot improves, continue. If not, change chemistry before increasing pressure. That habit prevents most accidental damage.
Choose the method by the defect you see
Successful chrome restoration comes from matching the method to the defect instead of using one product for everything. These are the combinations that consistently work in home restoration.
| Problem | Best home method | What to avoid |
|---|---|---|
| Road film, grease, fingerprints | Wash with pH-neutral shampoo, dry, then use chrome polish | Household scouring pads |
| Water spots, mineral deposits | Vinegar-based spot treatment or dedicated water-spot remover, then polish | Scraping with blades |
| Light surface rust | Lubricated 0000 steel wool or crumpled aluminum foil with chrome polish | Coarse steel wool, dry rubbing |
| Fine haze and swirls | Non-abrasive metal polish by hand with microfiber | High-speed wool pads |
| Pitting and flaking | Clean, stabilize, protect, and evaluate for replating | Heavy buffing that thins surrounding chrome |
The reason these pairings work is mechanical and chemical. Mineral deposits sit on top of the finish, so mild acids or dedicated removers dissolve them. Surface rust starts in tiny pores or chips; ultrafine steel wool or foil, used with lubricant, shears off oxidation while minimizing scratching. Haze responds to fine polishing agents that level contamination and restore reflectivity. Pits are different: they are missing material. No polish can replace metal that is gone. At best, you can reduce staining inside pits and improve contrast so the part reads cleaner from a normal viewing distance. That realistic expectation separates a disciplined restoration from a frustrating one.
Clean and decontaminate before polishing
Always start with a thorough wash. Chrome often looks dull simply because it is carrying wax residue, traffic film, oxidized rubber transfer, or calcium deposits. Use warm water, a quality automotive shampoo, and a soft wash mitt, then dry with microfiber or compressed air around seams. If the part still feels rough, use a clay bar with lubricant. This is especially useful on bumper overriders, luggage racks, and trim stored for years in a dusty garage. Clay removes bonded contamination that polish alone tends to drag across the surface. After claying, wipe with diluted isopropyl alcohol so you can judge the actual finish without fillers or leftover surfactants.
For hard water spots, soak a microfiber towel with a vinegar-and-water mix or use a commercial spot remover designed for automotive brightwork. Lay the towel on the area for a minute rather than scrubbing immediately. Dwell time does the work. On intricate pieces such as emblems or faucet handles, cotton swabs and soft detailing brushes reach recesses without forcing grit over the broad polished sections. If grease is present from old compounds or roadside tar, a citrus-based degreaser can help, but rinse it completely. Any cleaner left in seams continues reacting and can stain adjacent materials. A careful cleaning stage often delivers most of the visual recovery before actual correction begins.
Remove rust and polish without thinning the plating
When rust is light, the safest proven method is chrome polish applied with 0000 steel wool or a soft microfiber applicator. Keep the surface lubricated and use short, gentle strokes following the shape of the part. I often work a two-inch section, wipe it, and inspect immediately. If the rust transfers to the towel and the chrome underneath remains bright, continue. If the area turns dull silver or yellowish, stop; you are likely through the top chrome layer and exposing nickel. Crumpled aluminum foil dipped in water or polish can also work on light rust because aluminum is softer than many abrasives, though results vary by plating thickness and contamination type.
For broader haze or minor scratches, a dedicated chrome or fine metal polish by hand is usually enough. Products from established brands such as Autosol, Mothers, Simichrome, and Meguiar’s have predictable cut and finish, which matters when you are trying to control material removal. Apply a small amount, let the polish turn dark as it lifts oxidation, then buff clean with a fresh towel. Powered polishing can speed up large parts like motorcycle exhaust heat shields or bumper faces, but keep speeds low and pressure light. Excess heat softens adhesives behind trim, marks plastic-backed parts, and accelerates edge burn-through. If a scratch catches a fingernail, assume it is too deep to remove safely at home.
Handle pits, peeling, and mixed materials the right way
Pitted chrome is the issue most home restorers misunderstand. Pits are corrosion craters where moisture penetrated defects in the plating and attacked the base metal. Polishing can brighten the surrounding surface and clean brown residue from the pit mouths, but it cannot rebuild the missing structure. On steel parts, I sometimes use a rust converter only on tiny exposed areas at the back or underside, never broadly on visible chrome faces because residue can stain and telegraph through. On show surfaces, the home goal is stabilization: remove active rust, dry the part thoroughly, and seal it. If the pitting is severe across a front bumper, grille surround, or classic handle set, professional copper build-up, leveling, and replating is the correct repair.
Peeling chrome is even less repairable. Once plating lifts, the bond has failed. Buffing around the edge often enlarges the defect. The best response is to clean gently, avoid catching the edge with towels or pads, and decide whether the part is acceptable as a driver-quality piece. For modern plastic chrome trim, replacement is frequently more economical than refinishing because vacuum-metallized surfaces are thin and difficult to restore convincingly. Mixed-material assemblies need extra care. Rubber-backed trim should never be soaked in strong solvents, and die-cast emblems with painted recesses should be masked before polishing. In many restorations, the smartest move is selective improvement: make the visible sections presentable and preserve fragile details rather than chase perfection.
Protect the finish and build a practical maintenance routine
Once the chrome is clean and corrected, protect it. A quality wax, paint sealant, or ceramic spray compatible with metal surfaces reduces water spotting and slows oxygen and salt contact with pores. I favor synthetic sealants on daily-driven vehicles because they last longer through washing than traditional carnauba wax, while wax remains a good choice for frequently maintained garage-kept classics. Apply protection thinly and buff completely, especially around mounting points and seams where residue hardens. On motorcycles, bicycles, marine hardware, and outdoor fixtures, protection matters even more because exposure cycles are harsher and contamination is constant.
Maintenance should be simple and regular. Wash chrome with the rest of the vehicle using gentle soap, dry it instead of air-drying, and remove bugs, bird droppings, and winter road salt quickly. Reapply protection every few months on exposed parts, or sooner if water no longer beads and sheeting becomes irregular. Store spare trim in a dry cabinet wrapped in acid-free paper or clean microfiber, not newspaper or damp cardboard. Most importantly, inspect restored pieces periodically. Tiny rust freckles are far easier to arrest early than after they become pits. If you are building out a complete DIY restoration plan, pair this hub with guides on metal polishing, rust prevention, trim removal, fastener cleanup, and protective coatings so each step supports the next. Restore one part this weekend, document your process, and let that small win set the standard for the rest of the project.
Frequently Asked Questions
Can you really restore chrome parts at home, or do they always need professional replating?
Yes, many chrome parts can be restored at home, and for a lot of restoration projects, that level of work is more than enough to make trim, mirrors, bumpers, racks, and small hardware look dramatically better. The key is understanding what “restoration” means in this context. At home, you are usually cleaning, decontaminating, removing surface rust, improving staining, and polishing the existing plated finish. That is very different from replating, which involves stripping the old coating and rebuilding the copper, nickel, and chrome layers in a controlled shop environment.
If the chrome is dull, lightly pitted, hazy, stained, or spotted with minor rust bloom, home restoration is often practical and cost-effective. Gentle polishing, careful rust removal, and protection can return a bright, presentable finish without the expense of sending parts out. This approach works especially well on driver-quality vehicles, garage-kept classics, motorcycles, bicycles, and household chrome hardware where the goal is a clean, reflective appearance rather than concours-level perfection.
Professional replating becomes necessary when the decorative chrome layer is badly worn through, deeply pitted, peeling, flaking, blistered, or heavily corroded underneath. Once the plating system has failed, no amount of polish can replace missing metal. In those cases, home methods can still improve appearance temporarily, but they cannot truly rebuild the finish. So the realistic answer is this: home restoration is excellent for improving and preserving existing chrome, but only replating can fully repair severe damage at the coating level.
What is the difference between polishing chrome and replating chrome, and why does that matter?
This is one of the most important concepts to understand before you start. Polishing chrome means refining the existing surface. You are removing contamination, oxidation, light rust staining, water spots, and very fine surface defects to bring back clarity and shine. You are working with what is already there. Replating, by contrast, means the original finish is stripped or otherwise rebuilt and new metal layers are applied to recreate the decorative and protective coating.
That distinction matters because it affects your expectations, your method, and your risk level. Decorative chrome is usually a thin outer layer over nickel and sometimes copper, depending on the base material and the quality of the original part. If you use aggressive abrasives, coarse pads, or heavy compounding without care, you can cut through that thin outer layer and expose the nickel beneath. Once that happens, the part may still shine, but it is no longer truly intact chrome, and long-term corrosion resistance can be reduced.
Knowing whether you are polishing or dealing with a failed plated surface also helps you decide whether a home fix is worthwhile. If the part has superficial problems, polishing can be very rewarding. If it has structural pitting, peeling edges, or widespread loss of plating, trying to “polish it out” can waste time and may make the damage more obvious. In practical terms, polishing is maintenance and cosmetic improvement; replating is a complete finish restoration process. When you understand that difference, you can choose the right goal for each part and avoid overworking delicate chrome surfaces.
What is the safest way to clean and polish chrome at home without damaging it?
The safest method is to start with the least aggressive approach and only step up if the surface truly needs more correction. Begin by washing the part thoroughly with mild soap and water to remove dirt, road film, grease, and grit. Dry it with a soft microfiber towel so you are not dragging abrasive particles across the finish. This first cleaning step matters more than many people realize, because polishing a dirty surface can create fine scratches that reduce reflectivity.
Once the part is clean, inspect it under good lighting. If the chrome is just dull or lightly stained, use a chrome polish or a non-abrasive metal polish on a soft microfiber cloth or foam applicator. Work in small sections with light to moderate pressure, then buff the residue away with a clean towel. For tighter areas such as trim edges, brackets, or hardware recesses, a soft detailing cloth or cotton swab can help you control the product without smearing polish into surrounding materials.
If you are dealing with tiny rust specks, use a very gentle rust-removal method rather than jumping to sandpaper or steel wool. Many restorers use fine aluminum foil with water or chrome polish because aluminum is softer than chrome and can help lift oxidation without being overly aggressive when used carefully. The key is light pressure and frequent inspection. If the towel keeps turning dark but the finish is improving, that is normal. If you see yellowish or different-colored metal tones emerging, stop, because you may be thinning or breaking through the top layer.
After polishing, wipe the part clean and apply a protective wax, sealant, or corrosion-inhibiting protectant. Protection helps slow down future spotting and rust bloom, especially on vehicles exposed to moisture or road salts. In short, the safest home process is wash first, polish second, correct rust gently, and protect last. Patience and restraint almost always give better results than aggressive scrubbing.
How do you deal with rust spots, pitting, and cloudy chrome when restoring old parts?
These issues need to be approached individually, because they do not all respond the same way. Rust spots on chrome are often the most encouraging problem because many of them are surface deposits rather than total plating failure. If the underlying chrome is still intact, you can often remove those spots with chrome polish, a soft cloth, and a gentle aid such as lubricated aluminum foil. The idea is to dissolve or lift the rust without cutting deeply into the plated finish. Once the rust is removed, polishing can restore much of the shine.
Cloudy chrome is usually easier to correct than pitting. Haze can come from oxidation, mineral deposits, old wax buildup, neglected grime, or micro-abrasion from years of washing. A careful cleaning followed by a dedicated chrome polish often improves cloudiness significantly. In many cases, what looks like “dead chrome” is really contaminated chrome. That is why a test section is so useful. Clean and polish one small area before judging the whole part.
Pitting is the toughest issue because it usually indicates corrosion has breached the surface and attacked the metal layers underneath. Polishing can brighten the surrounding areas and make the part look cleaner overall, but it cannot fill pits or replace missing chrome. In fact, heavy polishing around pits can make them appear sharper because the surrounding surface becomes brighter and more reflective. For lightly pitted parts, home restoration may still produce a very respectable driver-quality finish. For severe pitting, the realistic choices are to live with some imperfections, replace the part, or have it professionally replated.
A good rule is this: surface rust and haze are often fixable at home, while true pitting is usually manageable cosmetically but not reversible. The best results come from improving what is left, stabilizing corrosion, and protecting the part so the damage does not spread as quickly.
Which chrome parts are good candidates for home restoration, and when should you stop and call a plating shop?
Home restoration is ideal for parts that still have most of their original finish but have become dull, dirty, lightly rusted, or mildly stained with age. Good candidates include exterior trim strips, mirror housings, roof racks, small brackets, bezels, horn rings, motorcycle covers, bicycle parts, towel bars, shelving, and other decorative hardware. These items often respond well to careful hand cleaning and polishing because the damage tends to be on the surface rather than deep in the plating structure.
Large bumpers can also be improved at home, especially if they mainly suffer from oxidation, road film, and small rust freckles. However, bumpers often reveal the limits of home work because they are highly visible and commonly develop pitting along seams, edges, and the lower face. You can absolutely make a tired bumper look cleaner and brighter, but if it has heavy corrosion, peeling plating, or obvious metal loss, a plating shop is the only route to a near-new finish.
You should stop and consider professional help when you see flaking chrome, blisters, cracking, deep rust bleeding from underneath the finish, widespread pits, exposed base metal, or signs that the substrate itself is failing. Pot metal and die-cast parts deserve extra caution because once they corrode badly, restoration becomes more complex than simple polishing. You should also pause if you find yourself needing aggressive abrasives just to get a visual change. That usually means the damage is beyond safe cosmetic correction.
The practical decision comes down to the part’s importance, visibility, replacement cost, and your desired finish level. If you want a clean, honest improvement for a driver or a personal restoration, home methods are often exactly the right choice. If you want show-level perfection or the chrome system is physically failing, that is when a plating shop earns its place.




